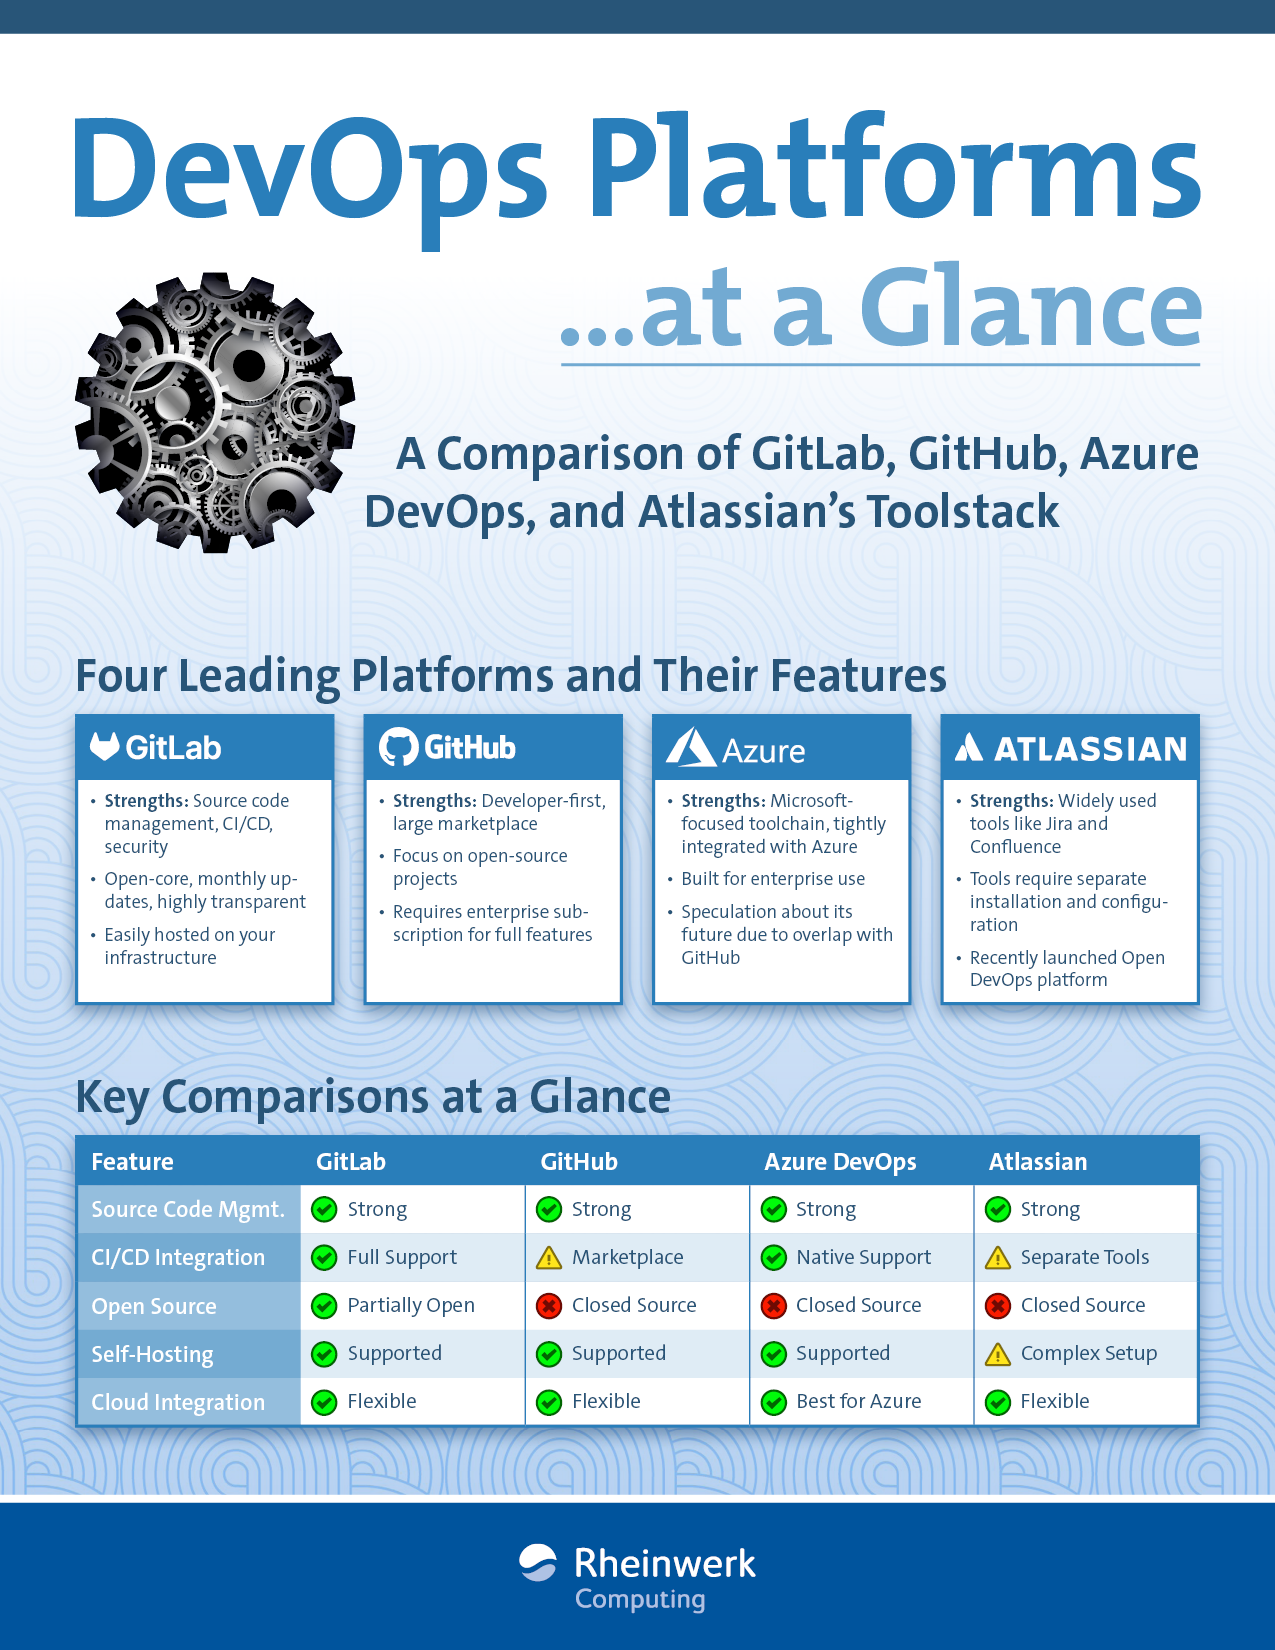
Azure DevOps is Microsoft’s offering for companies to conduct modern software development with continuous integration/continuous deployment (CI/CD) and a dash of project management.
In terms of web interface, Azure DevOps is more reminiscent of its competitor GitLab than GitHub, probably due to the vertical main menu bar on the left.
Azure DevOps evolved from Microsoft Visual Studio Team Services (VSTS), which in turn was the successor to Visual Studio Online. These two predecessor products were actually only known to die-hard Microsoft users who practiced software development in Microsoft Visual Studio. With Microsoft’s move to the cloud and the Microsoft Azure platform, this limited audience is changing somewhat since Microsoft Azure is also interesting for customers who don’t rely on Microsoft for an operating system.
Azure Cloud versus Azure DevOps: The naming and pricing policies of Microsoft’s cloud offerings aren’t always easy to understand. With a free Azure DevOps account, you can currently create an unlimited number of Git repositories and also create and run pipelines. If your project isn’t open source, you’re limited with regard to automatic test runs. To use other services from the Azure Cloud (for example, Kubernetes or the container registry), you must submit your credit card details. Billing depends on the individual services.
Trying Out Azure DevOps
Compared to GitHub and GitLab, Azure DevOps wants to score with (even) more team functions, as shown in the prominent placement of agile tools, such as Kanban boards, backlogs, and sprint planning in the web interface. In this section, we’ll show you a workflow with Azure DevOps using a simple Node.js project.
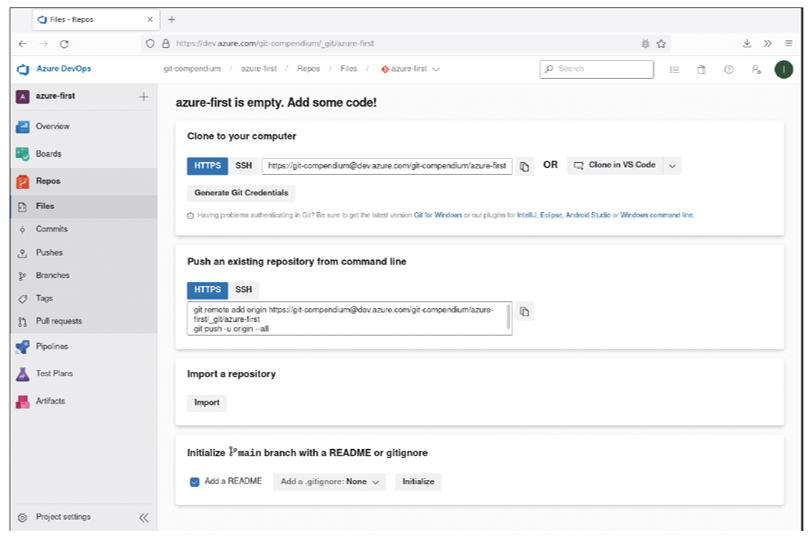
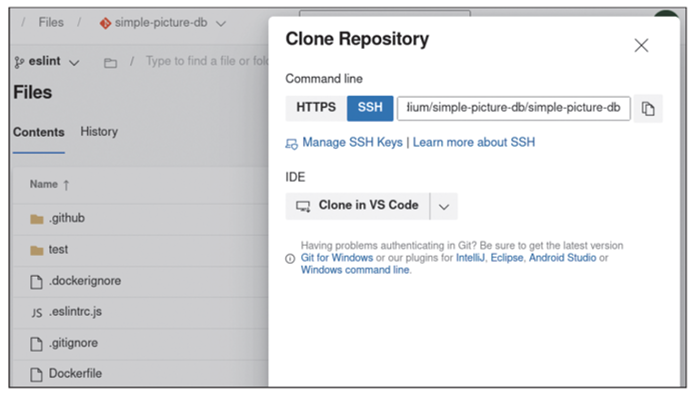
Using our Microsoft account, the first step is to create a new project in the web interface at https://dev.azure.com/. Then, we’ll import a Node.js example from GitHub. For this task, we’ll simply specify the GitHub URL when importing, and the code is imported. An interesting difference from GitHub and GitLab becomes apparent upon closer inspection: An Azure DevOps project isn’t limited to a Git repository, which is also evident when cloning our repository. Use the following command to clone a repository via SSH:
git clone git@ssh.dev.azure.com:v3/git-compendium/simple-picturedb/
simple-picture-db
In this case, the first simple-picture-db denotes the project, and the second stands for the Git repository of the same name. Azure DevOps additionally provides a convenient way to clone a Git repository directly in the integrated development environment (IDE) of your choice: Behind the dropdown button with the default setting Clone in VS Code, other common IDEs can be accessed, such as Android Studio, IntelliJ IDEA, WebStorm, or PyCharm. Our tests with VS Code worked fine (even on Linux), whereas the other options may rely on an installed version of Visual Studio.
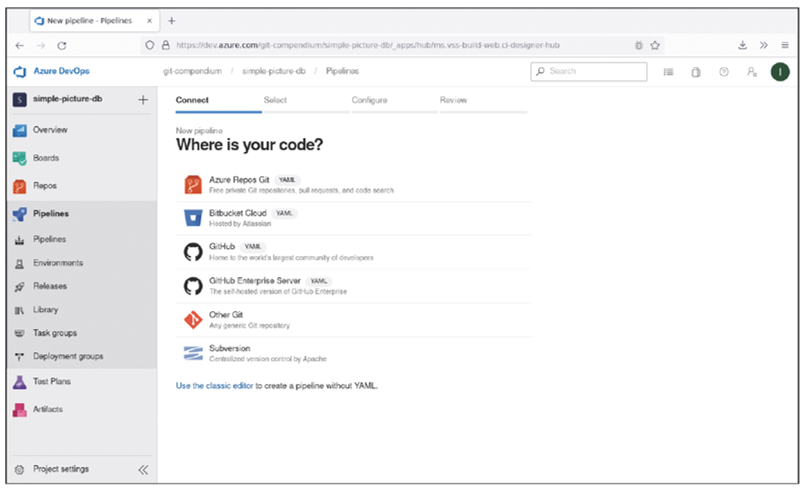
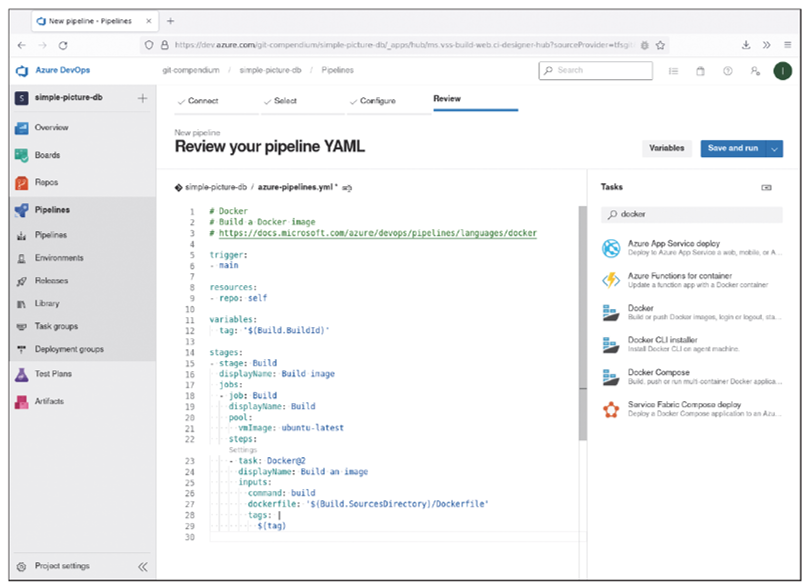
Pipelines are created and edited directly in the browser. First, you’ll select the source code, and in Azure DevOps, this selection isn’t limited to your own Git repository. You can also tap into sources from Git hosts.
A convenient feature for newcomers to the pipeline business is the selection of predefined actions. You can choose from many tasks for different programming languages.
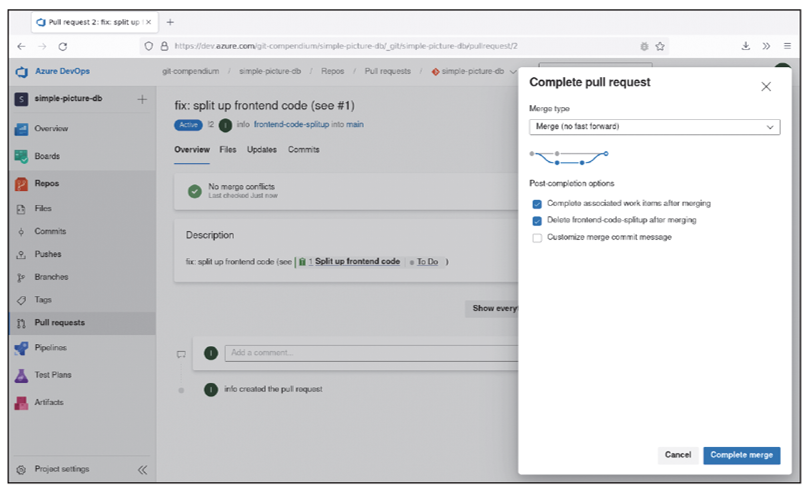
As a final point in the short Azure DevOps demonstration, we’ll walk through the lifecycle of a work item. First, create an issue in the To-Do board. The requirement is that frontend code of our application should be organized into separate HTML, CSS, and JavaScript files. When creating the issue element, you can create a branch for development right away by using frontend-code-splitup. When we now call git pull on our computer in the cloned directory, a new branch is created following the remote frontend-code-splitup.
You could have accomplished the same thing by first creating the branch locally and pushing it after making changes to the source code, for example, with the following commands:
7
git checkout -b frontend-code-splitup
# change code ...
git add .
git commit -m "fix: split up frontend code (see #1)"
git push --set-upstream frontend-code-splitup
Once you push the changed branch, you’ll see a notice in the web interface indicating that we can now create a pull request from the changes. Unlike in GitLab and GitHub, this notice won’t be displayed in the console after the push. Microsoft probably assumes that Azure DevOps users won’t have as much contact with the command line but rather use Git integrated in an IDE.
Test Plans
An important aspect of CI/CD pipelines is automated testing. The concept behind this feature is that, if the source code has an extremely high coverage with tests, shipping a new version won’t cause any problems and can be done automatically (provided the tests are all green).
Azure DevOps dedicates a separate menu item in the web interface to testing, namely, Test Plans. You can’t get started with test plans until you either provide your credit card details or activate the free trial month. (You can access these settings via Organization Settings > Billing > Basic + Test Plans at the bottom level of Azure DevOps, https://dev.azure.com/). Test runs can be performed on different hardware and for web applications also with different browsers. Microsoft needs to be paid for the computing power to be applied.
The configuration Microsoft provides for test plans is rather complex, to say the least. You’ll need to create test plans, which in turn are assigned to individual issues and can be performed by members of your team and then assessed positively or negatively. Describing all these tasks would take us too far away from Git, but we recommend the following tutorial at Azure DevOps Labs if you’re interested: https://azuredevopslabs.com/labs/azuredevops/testmanagement
Conclusion
If you already use Azure Cloud Services anyway, Azure DevOps is certainly a good place for your Git repositories. Integrated project management with agile techniques can be the all-round, carefree package for many companies. Presumably, your corporate credit card is already on file with Microsoft, and the additional cost won’t create any additional work for your accounting department.
On the other hand, if you choose a Git host without a Microsoft background, Azure DevOps probably won’t be your first choice. Both GitLab and GitHub offer solutions that don’t require tight integration with a Microsoft account and provide the full package with CI pipelines and actions, respectively. For a leaner system (without integrated CI/CD), a particularly good choice is Gitea.

Editor’s note: This post has been adapted from a section of the book Git: Project Management for Developers and DevOps Teams by Bernd Öggl and Michael Kofler. Bernd is an experienced system administrator and web developer. Since 2001 he has been creating websites for customers, implementing individual development projects, and passing on his knowledge at conferences and in publications. Michael studied telematics at Graz University of Technology and is one of the most successful German-language IT specialist authors. In addition to Linux, his areas of expertise include IT security, Python, Swift, Java, and the Raspberry Pi. He is a developer, advises companies, and works as a lecturer.
This blog post was originally published 4/2024.
.png?height=600&name=What%20Is%20DevOps%20and%20Continuous%20IntegrationContinuous%20Deployment%20(CICD).png)

Comments