When you create applications using Node.js, the source code of that application is contained in one or more files.
When launching the application, you specify the name of the initial file as an option in the command line. From this file, you then load the rest of the components of your application via the Node.js module system. The entire source code is read in and optimized by the JavaScript engine. As a consequence, changes to the source code don’t directly affect the running application. This means you need to exit and restart it for the changes to become active. The listing below shows how you can run an application with Node.js.
$ node server.mjs
Hello world!
$
The server.mjs file contains only the console.log('Hello world!') line. The advantage of this method of running an application is that you can run the application as many times as you want, and all you need to do is run the command line from the above listing. In addition, you can easily run the source code on other systems or make the application available to other users as open-source software.
Node.js Module Systems: Currently, Node.js supports two different module systems. The previous implementation—the CommonJS module system—uses module.exports to export elements and the require function to load elements. This module system has been part of the Node.js platform from the beginning.
Meanwhile, another module system—the ECMAScript module system—has also been included in the standard ECMAScript. This system uses the import and export keywords and isn’t compatible with the CommonJS module system.
For several years now, Node.js has been in a transition phase away from the CommonJS module system and toward the ECMAScript module system. For the ECMAScript modules to work, it’s required that the files have the .mjs extension.
Note that the output of Hello world! doesn’t yet represent an application. However, with Node.js, you can create dynamic web applications without the need for a separate web server because Node.js allows you to create your own web server via the http module. The following sections will guide you step by step through the classic example of a Node.js application: a very lightweight web server.
Web Server in Node.js
The web server you develop in this example should be able to accept requests from browsers and respond to them with a correct HTTP response and the output of the Hello world string. You start with a basic framework and extend it until the application meets the requirements. The listing below contains the basic structure of the application. You should save this code in a separate file named server.mjs.
import { createServer } from 'http';
const server = createServer();
server.listen(8080, () => {
console.log(
`Server is listening to http://localhost:${server.address().port}`,
);
});
3
Template Strings: With template strings, such as those used above, there is a third way to define strings in JavaScript besides single and double quotes. However, this is a special form whose processing is somewhat slower than that of simple strings. With template strings defined with the backtick character (`), you can use ${} to replace variables or evaluate the JavaScript expressions within a string. It’s also possible to insert line breaks without concatenating the string with the + operator.
Actually, a JavaScript engine such as V8 doesn’t have the capabilities to provide a web server in a simple way. For this reason, modules exist for Node.js that extend the functionality of the Node.js platform. In this example, you need the functionality of a web server. A separate module exists for Node.js for this purpose and to solve other tasks related to HTTP. The functionality from the various modules of Node.js is automatically available to you. As a developer, all you need to do is load the modules you need for your application before using them. Loading modules and other files in Node.js is done via the import keyword. As you can see in the example, you can directly address the parts of the interface of the respective module that you need for your application.
var, let, and const: In JavaScript, there are now three ways available to define variables. Each of these ways has an impact on the way you develop your applications. If you define your variables by prefixing them with the var keyword, this has the effect that the variable is valid in the current function and all subfunctions. For a long time, this was the only available option.
The let keyword enables you to define variables at the block level. For example, if you define a counter variable in a for loop with let, this variable is valid only within the loop. A variable defined with let in a function has the same properties as one defined with var. let has the same range of functions as var except that you have even better control over the scope. So, there are actually hardly any reasons to continue using var. However, be careful not to mix var and let within your application, as this can easily lead to errors that are difficult to locate.
The third way to define a variable is with the const keyword. Such variables aren’t variables in the true sense, but constants, which means that you can’t change the value of the variable after the initial assignment. The fact that JavaScript works with references for nonprimitive values such as objects or arrays puts the whole thing into perspective again. With a const object, you can no longer change the reference, but you can change the properties of the object itself. Try to use const as much as possible during development to avoid overwriting variables by mistake. If you actually need variables, you should use let.
Using the http module, you can create a client to query other web servers in addition to the initial server. However, for your web server application, you only need the server. You can create this with the imported createServer function of the http module. The return value of this method is the HTTP server, which is available to you as an object for later use. The newly created server object currently has no functionality, nor is a connection opened to the outside world.
The next step is to open this very connection toward the clients so that they can connect to the server and retrieve data. The server provides you with the listen method, a way to specify a port and an IP address through which your users can connect to the server. You can pass the port number and the IP address to which the server should be bound to the listen method. Normally, however, you should at least specify the port number, as otherwise any free port will be assigned. The port number is specified as an integer, which must be between 0 and 65,535. There are two things to keep in mind when choosing a port for your web server: The port used must not already be taken by another application, and it should not be in the range of system ports between 0 and 1,023. If you use a port 1,024 or higher, you can run your Node.js script as a normal user; for ports below that value, you need admin privileges. You should always run tests and examples as a normal user because as an administrator you have considerably more privileges and can seriously damage the system. You can specify the IP address as a string, for example, '127.0.0.1'. If you don’t specify any address, the IPv6 address :: or the IPv4 address 0.0.0.0 will be used by default. This means that the server is bound to all interfaces of the system. So, for example, you can reach your server using the name localhost.
In addition to specifying the address and port, calling the HTTP server’s listen method opens the connection and makes the server wait for incoming requests. You can also pass a callback function to the listen method as the last argument. This is executed as soon as the server is bound. In the example, this function outputs the information that the server is ready to operate and at which address you can reach it. If you don’t take care of such an output yourself, Node.js doesn’t display any further information. Now you should save the script under the name server.mjs. You can run the web server on your system and test the result already. Below shows what the result of the test looks like.
$ node server.mjs
Server is listening to http://localhost:8080
If you get the error create Server: listen EADDRINUSE :::8080 when running your application, it means that the port is already taken by another application, and you need to choose another port for your Node.js application.
The node command with the file containing the source code of the web server as an option causes a Node.js process to be started that connects to the specified combination of address and port and then waits for incoming connections that it can serve. By executing the script, the command line is blocked, and you can’t make any further entries to it. Due to the architecture of Node.js, which is based on the event-driven principle, very little load is created by the web server script because Node.js doesn’t block when it has nothing to do. If you want to cancel the script, you can do this via the (Ctrl)+(C) shortcut, which returns a command prompt. Now you can test the web server with your browser by entering “http://localhost:8080” in the address bar.
The problem is that although your web server is bound to the correct address and port, it has no logic to handle incoming requests. This primarily causes you to get no output when testing, and, if you leave your browser window open long enough, a time-out error. For this reason, you’ll insert source code in the next step to ensure that incoming requests are also served in a meaningful way.
The web server you create here in Node.js differs seriously in some features from other implementations in dynamic scripting languages such as PHP. Here, each request is served separately, and the necessary source code is read in the process. With Node.js, the application’s code is read once and then remains in the memory. The application runs permanently. This is where an important aspect of Node.js comes into play: asynchronous task processing. The web server responds to events, in this case, to the clients’ requests. For this purpose, a function is defined—a callback—which is executed as soon as a request is received. Although this code is defined in a block, as in other languages, the source code responsible for handling the requests isn’t executed until such a request is received.
Extending the Web Server
In the listing below you can see the extended source code from earlier. This version of the web server can also handle requests correctly.
import { createServer } from 'http';
const server = createServer((request, response) => {
response.writeHead(200, { 'content-type': 'text/plain; charset=utf-8' });
response.write('Hello ');
response.end(' World\n');
});
server.listen(8080, () => {
console.log(
`Server is listening to http://localhost:${server.address().port}`,
);
});
The only adaptation of the example from before takes place in the call of the createServer function. Here, Node.js receives the callback that specifies what should happen when a request from a client reaches the server. In this simple example, you first just output the string Hello world in the client’s browser.
To achieve this output, you should first look at the structure of the callback function. It has two parameters, a request and a response object, representing the client’s request and the server’s response, respectively. In this example, you should first disregard the client’s request and focus on the server’s response. The first step is to prepare the HTTP header information that will later be sent back to the client. This is done using the writeHead method. The first argument of this function consists of a number representing the HTTP status code. The second argument is an object that contains the actual HTTP header. The key values of the object, such as the content-type value in the example, should be written in lowercase according to convention. In the example, you can see the specification of the content type, which in this case is set to text/plain to indicate to the client that the server’s response contains only text. Because some browsers such as Firefox return error messages if the character coding isn’t specified correctly, the content type is extended by the information charset=utf-8 to inform the browser that the HTTP body is UTF-8 encoded.
You can create the response visible to the user—the HTTP body—using the write method. When this method is called, fragments of the response, called chunks, are sent. You can call this method several times in a row, which will result in the individual parts being joined together. However, you should make sure that before calling write, the correct HTTP headers are always sent with writeHead. If you don’t call the writeHead method, the Node.js HTTP server implicitly sends an HTTP header with a status code of 200 and a content type of text/plain, so a response without explicitly providing header information is also valid. Calling write ensures that parts of the response are sent to the client. However, in this case, the client doesn’t know when the server is finished sending the response. You, as the developer, must take care of this by using the end method of the response object. You can optionally provide a string as an argument. In this case, end behaves in the same way as write as it sends the specified chunk to the client and then terminates the response.
The write method has two other features worth mentioning. For one thing, not only can you pass strings as arguments but also as buffer objects. A buffer object consists of binary data that greatly facilitates the streaming of data. This class of objects primarily comes into play when streams are used. The second feature consists of specifying the coding of the string, namely, via the second parameter of the write method. This is optional, and, if omitted, Node.js uses utf-8 as the default coding method. Possible other values are utf16le, ascii, or hex. UTF-8 as the coding method is permitted in this example, which is why it’s also not necessary to specify a character coding. As an alternative to combining multiple write calls and one end call, you can also store the entire response to the client in a variable and send it in a single call of the end method.
For the example to work correctly, you need to make sure that you restart the web server so that the custom source code from Node.js is read correctly. For this purpose, it’s best to terminate the possibly still running instance of the first example via the shortcut (Ctrl)+(C) and restart the web server by calling the node command again with the name of the file of your source code. This figure shows the result of the request.
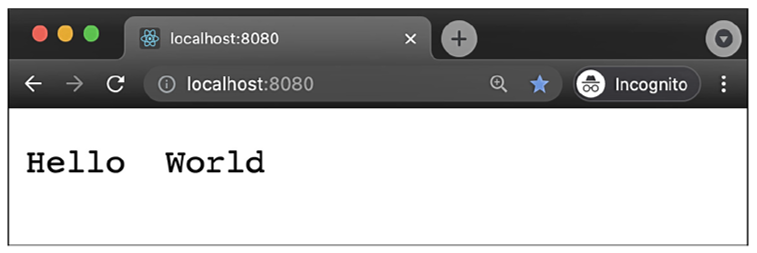
In this example, you’ve seen how it’s possible, with just a few lines of JavaScript code, to create a functional web server that responds to a client’s request with a correct HTTP response.
Creating an HTML Response
In reality, however, you rarely have to deal with responses from web servers in plain text. Thus, we’ll now extend the example so that the server responds with a response in HTML, just as a normal web server would. Below shows the adjustments you need to make for this.
import { createServer } from 'http';
const server = createServer((request, response) => {
response.writeHead(200, { 'content-type': 'text/html; charset=utf-8' });
const body = `<!DOCTYPE html>
<html>
<head>
<meta charset="utf-8">
<title>Node.js Demo</title>
</head>
<body>
<h1 style="color:green">Hello World</h1>
</body>
</html>`;
response.end(body);
});
server.listen(8080, () => {
console.log(
`Server is listening to http://localhost:${server.address().port}`,
);
});
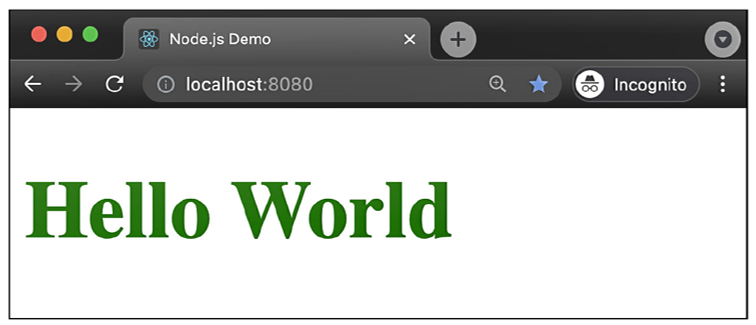
The only change you need to make to the source code of the example is to adjust the content type, which is now text/html instead of text/plain. In addition, the write was dropped, and the HTTP body is sent entirely using the end method. The value passed to the end method contains an HTML string that reflects the structure of the web page to be displayed. Because this string is quite large, it’s best to outsource it to the separate body constant and use a template string to create a clear multiline string with simple means. Finally, you must pass the body constant to the end method. Once you’ve made these changes, all you need to do is restart the Node.js process running your web server for the changes to take effect. When you reload the page in your browser now, you should see a similar result to the one shown in this figure.
Up to this point, you’ve predominantly been concerned with the response object, that is, the response to the client. Now it’s time to take a closer look at the request object, which is the actual request. This object allows you to read the information sent by the client and include it in the response generation.
Generating Dynamic Responses
In classic web applications, information is sent from the browser using the HTTP methods GET and POST. Mostly this is done via forms or parameters that are coded in the URL. You’ll now extend the example and display a string specified by the user in the URL on the output page.
You can use the source code from the previous listing as a basis. The adapted source code is shown below, followed by the corresponding explanations of the changes.
import { createServer } from 'http';
const server = createServer((request, response) => {
response.writeHead(200, { 'content-type': 'text/html; charset=utf-8' });
const url = new URL(request.url, 'http://localhost:8080');
const body = `<!DOCTYPE html>
<html>
<head>
<meta charset="utf-8">
<title>Node.js Demo</title>
</head>
<body>
<h1 style="color:green">Hello ${url.searchParams.get('name')}</h1>
</body>
</html>`;
response.end(body);
});
server.listen(8080, () => {
console.log(
`Server is listening to http://localhost:${server.address().port}`,
);
});
The most important adaptation of the source code is that you read the URL the client has requested in the source code and write parts of it in the response. In the request object, the information about which URL the user specified in their browser is present in the url property. For example, if you assume that the user typed the URL http://localhost:8080/?name=Besucher in the address bar of their browser, the url property of the request object contains the value /?name=visitor.
Your goal now is to output the Hello visitor string. To do this, you need to extract the string, in this case visitor, from the url property. You can do this, for example, by splitting the string with the JavaScript string function split at the equal sign and using the second element of the resulting array. However, this variant only works as long as the user passes only one parameter in the URL or this parameter is in the first position in the case of several parameters.
A better way to handle URLs is to use the WHATWG URL API, which is now a native part of the Node.js platform; therefore, no separate import is required for the URL class. Among other things, this API enables you to parse URLs and thus break them down into their individual components. To do this, you must create a new instance of the URL class and pass the constructor the relative path of the call contained in the url property of the request object and the base URL of your application, in this case, http://localhost:8080/. The newly created object represents the requested URL with all of its components. You can find the individual query parameters that were transferred in the searchParams property. You can read these using the get method and transfer the desired parameter name. In our example, this is the name string. Here, the number and order of the parameters in the URL no longer play any role either because you can access the value via the name of the parameter. Thus, you can then access the string the user has entered in the address bar of the browser via url.searchParams.get('name'). This means you have all the components you need to achieve your goal.
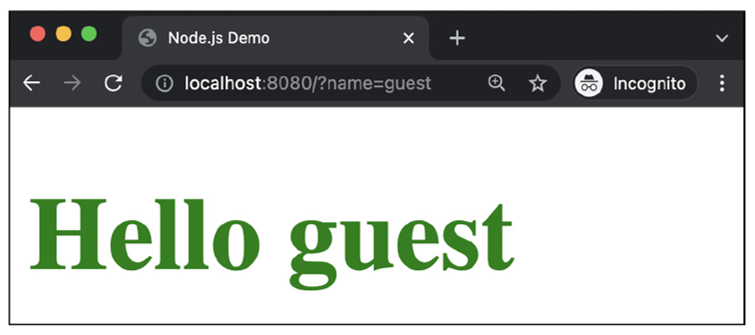
After you’ve made the adjustments to the source code and restarted the web server, you can test the result by calling the page again. The final figure shows the result you get when you call the page http://localhost:8080/?name=user.
Editor’s note: This post has been adapted from a section of the book Node.js: The Comprehensive Guide by Sebastian Springer. Sebastian is a JavaScript engineer at MaibornWolff. In addition to developing and designing both client-side and server-side JavaScript applications, he focuses on imparting knowledge. As a lecturer for JavaScript, a speaker at numerous conferences, and an author, he inspires enthusiasm for professional development with JavaScript. Sebastian was previously a team leader at Mayflower GmbH, one of the premier web development agencies in Germany. He was responsible for project and team management, architecture, and customer care for companies such as Nintendo Europe, Siemens, and others.
This post was originally published 4/2024.


Comments